
Uploading a Pin to Pinterest might seem like a simple click-and-post affair, but turning that upload into a real business asset?
That requires a plan. It’s the critical difference between just adding to the digital noise and actually connecting with an audience that’s ready to click, save, and buy.
Learning how to upload pins to pinterest with intention is the first step toward driving real traffic and sales from the platform.
Why Your Pinterest Upload Strategy Matters
It’s tempting to lump Pinterest in with other social media sites, but that’s a big mistake. At its core, Pinterest functions as a visual search engine.
People aren’t just mindlessly scrolling here; they’re actively planning their next purchase, looking for inspiration, and discovering new products.
This high-intent behavior makes every single Pin you upload a potential doorway to your website or online store.
If you’re just uploading Pins sporadically without any real thought, you’re leaving a massive opportunity on the table.
Think of it this way: one baker might occasionally post a blurry, uninspired photo of a cake. Another baker, however, consistently uploads beautiful, high-quality Pins optimized with keywords like “vegan birthday cake ideas.”
The second baker is meeting people exactly where they are, solving their problems, and establishing themselves as the go-to expert.
The Power of a Methodical Approach
A methodical upload strategy goes far beyond just getting an image online. It’s a deliberate process that considers every single element of your Pin—the visual itself, the keywords you use, the board you save it to, and even the time you publish it.
This thoughtful approach means your content is set up for success from the moment it goes live. You’re working with the Pinterest algorithm, helping it understand your content and show it to the right people. The numbers don’t lie. As of Q1 2025, Pinterest hit 570 million monthly active users worldwide.
Even more telling is that a massive 85% of weekly Pinners have bought something after seeing a brand’s Pin. The potential is huge.
Your Pinterest strategy isn’t just about what you Pin; it’s about how and why you Pin it. Every upload is a chance to answer a user’s search, solve their problem, or inspire their next project.
From Uploading to Winning
When you start thinking strategically about how you upload Pins, you’re no longer just creating disposable content. You’re building a library of evergreen assets.
A well-optimized Pin can continue to drive traffic for months, sometimes even years, unlike a tweet or an Instagram story that has a lifespan of just a few hours.
This mindset shift turns a simple task into a powerful engine for long-term growth.
To really nail this, you’ll need to focus on a few key pillars that form the foundation of any successful Pinterest workflow.
We’ll dive deep into these later, but for now, here’s a quick overview of what a solid upload strategy looks like.
To help you get started, this table breaks down the core elements of a winning Pinterest upload strategy.
Pinterest Upload Strategy At a Glance
| Strategy Pillar | Why It’s Important | Key Action |
|---|---|---|
| Consistency | Signals to the algorithm that you’re an active and reliable creator, which can boost your visibility. | Establish and maintain a regular Pinning schedule, whether it’s daily or a few times a week. |
| Optimization | Helps users discover your content through search. This is how you get found by your target audience. | Weave relevant keywords into your Pin titles, descriptions, and even the text on your Pin images. |
| Visual Quality | Captures attention in a visually-driven feed. Poor quality visuals get scrolled past instantly. | Always use high-resolution, vertically-oriented images or videos (2:3 aspect ratio is ideal). |
| Relevance | Ensures your content reaches an engaged audience by saving it to well-organized, topical boards. | Pin to the most relevant board first, and create new boards for specific niches as needed. |
Building these pillars into your workflow will fundamentally change your results on the platform.
Of course, none of this matters if your workflow is clunky and slow. A crucial part of a great strategy is achieving faster upload speeds to keep things efficient.
When it all comes together, a well-executed plan is one of the most effective Pinterest marketing strategies you can build.
Mastering the Native Pinterest Upload Workflow
Uploading Pins directly through Pinterest is a core skill you need to master. While it might seem like just pointing and clicking, every single field in the uploader is a chance to give your Pin a serious visibility boost.
Let’s walk through this process with a more strategic eye, making sure every Pin you publish is set up for success from the start.
Whether you’re working from your computer or on the go with the mobile app, it all begins by hitting “Create” and then choosing “Create Pin.”
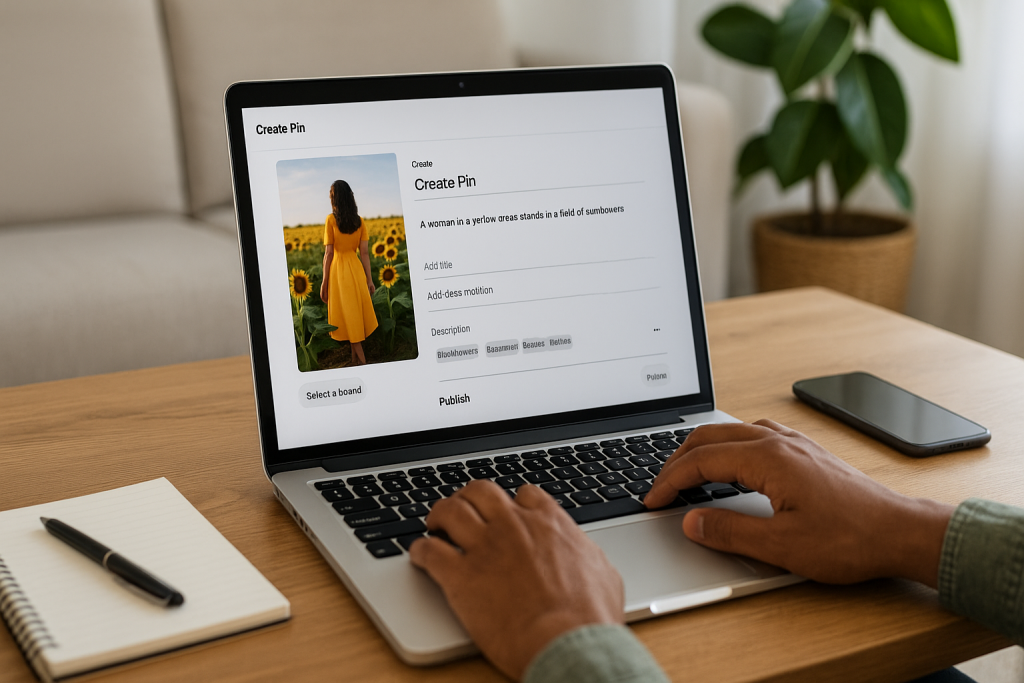
This brings up the uploader interface, which is basically your mission control for crafting a Pin that gets noticed.
This is what you’ll see—the command center where you’ll add your image or video, title, description, and link.
This is where you’ll pull all the pieces together before launching your Pin into the wild.
Don’t rush this part; each field has a specific job to do in helping people discover your content.
From Visuals to Value
First things first, you need a visual. This can be a static image or a video, but it has to be attention-grabbing. If you’re a home renovation blogger, maybe it’s a dramatic before-and-after of a kitchen remodel.
If you’re a fashion brand, a short video showing how a new dress flows would be perfect. Your visual is the hook, so make it a good one—always high-quality and vertically oriented.
The sweet spot for Pin dimensions is a 2:3 aspect ratio, which usually means 1000 x 1500 pixels. This takes up the most screen real estate on mobile.
Next up is your title. Please, don’t just write “New Blog Post.” Be specific and load it with keywords people are actually searching for.
For our home renovator, a title like “DIY Budget Kitchen Remodel Under $1000” is infinitely better. It tells Pinners exactly what they’re getting and what problem you’re solving.
Optimizing Your Pin Details
The description is your chance to expand on the title and weave in more keywords naturally. Think about what other details your audience would want.
For that kitchen remodel Pin, you could mention the brand of paint you used, where you found the cool hardware, or how long the project took.
This isn’t just keyword stuffing; it’s providing genuine value that helps Pinterest categorize your content correctly.
After the description, you’ll find two critical fields that are easy to skip but shouldn’t be.
- Alt Text: This is essential for accessibility, describing your image for visually impaired users. It’s also another signal to Pinterest’s search engine. Instead of “kitchen,” write something descriptive like, “Bright white kitchen with shaker cabinets, gold hardware, and a marble subway tile backsplash.”
- Destination Link: This is where you’re sending all that valuable traffic. Triple-check that the URL is correct and leads to the right page. A broken link is a dead end for the user and a wasted opportunity for you.
Finally, you have to choose the right board. This is your last strategic move before publishing. Saving your “DIY Budget Kitchen Remodel” Pin to a general “Home Decor Ideas” board is okay, but saving it to a niche board like “Kitchen Renovation Projects” is so much better.
It tells the algorithm exactly who to show your Pin to.
If you’re looking for a more in-depth, step-by-step tutorial on the absolute basics, we have a complete guide on how to post a Pin on Pinterest that breaks it all down.
Getting Every Pin Ready for Prime Time
Just hitting “publish” on a Pin and hoping for the best won’t get you very far. To really compete, you need to think like a publisher, not just a poster.
Each Pin is an asset you’re sending out to work for you, and your job is to give it everything it needs to succeed with Pinterest’s powerful search algorithm.
The game has changed completely. Gone are the days of pinning dozens of times a day just to stay visible. In 2025, the Pinterest algorithm is all about quality over quantity.
The old “spray and pray” method is dead. Now, the top 1% of Pins drive more than 50% of all impressions and clicks on the entire platform.
That’s a staggering statistic, and you can find more data like this over at Tailwind.
This shift puts a massive spotlight on optimization. Every single part of your Pin, from the words you use to the colors you choose, is critical.
Figure Out What People Are Actually Looking For
Good optimization always starts with good keyword research. The best part? You don’t need any expensive, complicated tools. Pinterest gives you everything you need right in its own search bar.
Just start typing a broad topic related to your content—let’s say, “healthy breakfast.” Pay close attention to the auto-suggestions that pop up as you type.
These aren’t guesses; they’re the exact phrases real people are searching for right now.
- healthy breakfast ideas
- healthy breakfast for weight loss
- healthy breakfast recipes easy
- healthy breakfast aesthetic
These are your golden keywords. Your job is to sprinkle them naturally into your Pin’s title and description.
So, instead of a generic title like “Breakfast Ideas,” you’d go for something much more specific and searchable, like “Healthy Breakfast Recipes Easy Enough for Weekdays.” It directly answers a user’s search.
Make Your Pin Impossible to Ignore
Let’s be real: Pinterest is a visual platform. Your design has to be top-notch. You could have the best keywords in the world, but they won’t save an ugly or confusing Pin.
The whole point is to create something that literally stops someone mid-scroll.
Key Takeaway: Always design for a phone screen. Stick to a vertical 2:3 aspect ratio (1000 x 1500 pixels). This size fills the screen on mobile devices, which is where most of your audience is, and the algorithm loves it.
Great images or videos are the foundation, but don’t sleep on text overlays. A big, bold headline splashed right on the image grabs attention way faster than the small description below it.
Use a font that’s easy to read and make sure there’s plenty of contrast between your text and the background.
If you really want to get into the nitty-gritty of design, we have a complete guide on how to create Pins that breaks down how to make visuals that actually get clicks.
Why “Fresh” Is Your Secret Weapon
The Pinterest algorithm is obsessed with newness. This is where the whole concept of “Fresh Pins” becomes so important.
A Fresh Pin is simply a new image or video that Pinterest has never seen before, even if it points to an old blog post or product page you’ve linked to in the past.
This is a game-changer because it means you don’t need to be on a content creation hamster wheel, churning out new blog posts daily. Instead, you can create multiple, unique Pin designs for one single piece of content.
For example, imagine you have a blog post about “DIY Kitchen Remodeling.” You could create:
- A Pin with a dramatic before-and-after photo.
- A Pin designed as a collage, showing off different details like the new countertops and backsplash.
- A quick Video Pin showing a time-lapse of you painting the cabinets.
Each one of those is a Fresh Pin. Each one gives you a brand new opportunity to show up in search results and reach a new audience.
This is how you stay consistent and build momentum without completely burning out.
Streamlining Your Workflow with Scheduling Tools
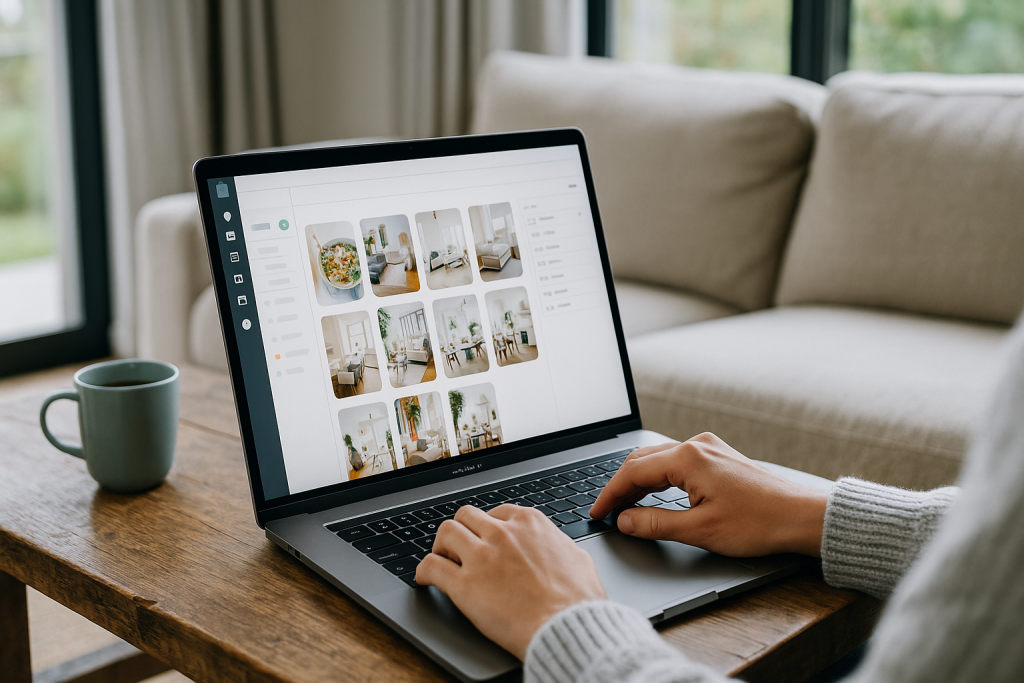
Let’s be honest, manually uploading Pins every single day is a surefire way to burn out. For a growth strategy that actually lasts, you need consistency.
This is where automation becomes your secret weapon. Using a third-party scheduling tool can completely overhaul your Pinterest game, turning hours of daily work into one focused session each week.
Imagine blocking out a couple of hours on a Monday to plan, design, and schedule your Pins for the entire week. That’s the magic of content batching.
Instead of constantly interrupting your workflow for a single upload, you get to work in dedicated, productive blocks.
You’ll maintain a steady stream of Fresh Pins without the daily scramble, which is a huge signal to the Pinterest algorithm that you’re a serious creator.
Why Schedulers Outperform Manual Pinning
Tools like our own Post Paddle are built to do more than just the basics offered by Pinterest’s native scheduler.
They’re designed for efficiency and scale, packed with features that maximize your reach while saving you a ton of time.
A good scheduler lets you bulk upload dozens of Pins at once, set them to go live during peak engagement hours, and then you can just walk away.
This workflow is a game-changer for staying consistent. For example, you could create 10 different Pin designs for one blog post and schedule them out across several relevant boards over the next few months.
It’s a smart strategy that keeps your best content circulating without ever looking spammy.
Unlocking Deeper Performance Insights
One of the biggest wins you get from a third-party tool is better analytics. Pinterest gives you the basics, but specialized tools offer much deeper insights into what’s actually resonating with your audience.
You can track performance trends over time, pinpoint your top-performing Pins and boards, and start making decisions based on data, not guesswork.
A scheduling tool doesn’t just save time; it provides the data you need to work smarter.
By analyzing click-through rates and engagement patterns, you can refine your strategy and focus your efforts on what drives real results for your business.
To really get your workflow humming, it’s worth exploring the best social media automation tools available. Finding the right platform can transform your entire process.
Native Pinterest Scheduler vs Third Party Tools
Trying to decide between Pinterest’s built-in scheduler and a more robust third-party tool? It really comes down to your workflow and goals.
Here’s a quick breakdown to help you see the difference.
| Feature | Native Pinterest Scheduler | Third-Party Tool (e.g., Post Paddle) |
|---|---|---|
| Bulk Uploading | Limited, one-by-one | Yes, upload dozens of Pins at once |
| Scheduling Window | Maximum of 30 days in advance | Often 6 months or more in advance |
| Advanced Analytics | Basic performance metrics | In-depth analytics, trend tracking |
| Cross-Platform | Pinterest only | Often supports multiple social platforms |
| Smart Scheduling | No, requires manual time selection | Yes, suggests optimal posting times |
| Content Batching | Cumbersome | Built for efficient batch creation |
Ultimately, while the native scheduler is a good starting point, a dedicated third-party tool is built for serious growth.
It equips you with the features you need to scale your efforts efficiently and make smarter, data-backed decisions.
This decision tree gives you a visual for the simple, but critical, workflow for getting a new Pin ready to publish.
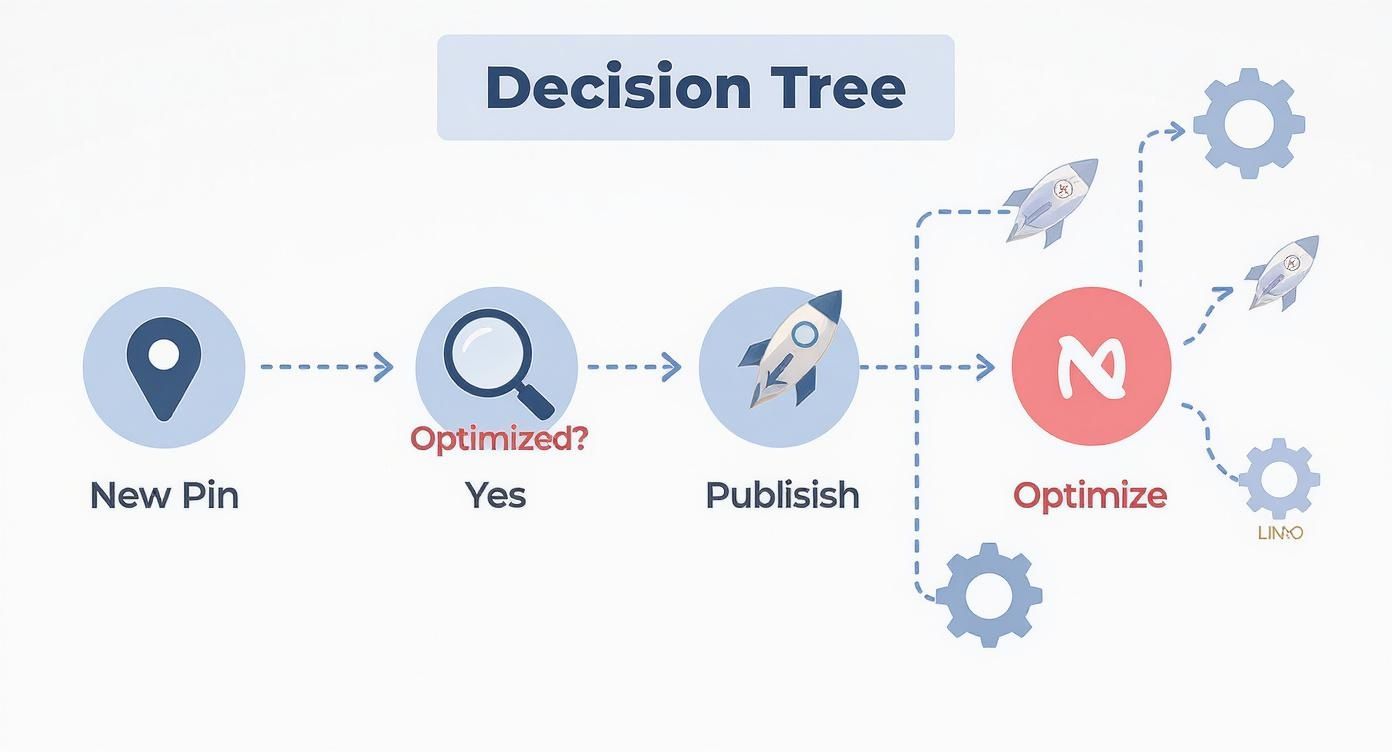
The key takeaway here is that optimization isn’t just a “nice-to-have.” For any Pin you want to see succeed, it’s a mandatory part of the process.
Using Advanced Pin Formats for Growth
If you’re serious about growing on Pinterest, you have to move beyond just posting standard, static images.
The platform offers a whole toolkit of different Pin formats, each built for a specific purpose—whether that’s making direct sales or building a genuine community around your brand.
This is non-negotiable for e-commerce brands. Pinterest has become a massive shopping destination, and by 2025, over 50% of users will be logging on specifically to shop and discover new products.
The platform now has 1.8 billion shoppable pins, and that number is only growing.
The connection between pinning and purchasing is incredibly strong here. In fact, Pinterest drives 10 times higher shopping intent per session than other social platforms.
If you want to dive deeper into the numbers, you can discover more about these Pinterest trends and what they mean for sellers.
Turn Your Feed into a Storefront with Product Pins
For anyone running an online store, Product Pins are an absolute game-changer.
These aren’t just static images with a link; they are dynamic, “live” Pins that pull real-time information straight from your product catalog.
This means they automatically show up-to-date pricing, stock levels, and a direct link to the checkout page. It’s a seamless path from discovery to purchase.
To get going, you’ll need a Pinterest business account and a product catalog connected to your profile.
Once you set up that connection, your product info syncs automatically, creating shoppable Pins that keep your feed fresh without you having to manually update every single one.
Capture Attention with Video Pins
In a feed where everyone is scrolling a mile a minute, motion is your best friend. Video Pins are fantastic for stopping someone mid-scroll and telling a more compelling story.
You don’t need a massive production budget, either—a simple, well-lit video shot on your phone can do the trick.
Here are a few ideas that work really well for Video Pins:
- Show your product in action. A quick clip of someone actually using your product is infinitely more persuasive than a flat photo.
- Film a mini-tutorial. Show your audience how to do something related to your niche. This builds trust and provides instant value.
- Animate your text. Even adding simple motion to text overlays on an image can make it feel more dynamic and engaging.
My advice? Keep your videos short and sweet, somewhere between 15 and 60 seconds. And always, always design them to make sense without sound. Use text overlays or clear captions to get your message across.
Pro Tip: The very first frame of your video is everything. It acts as the cover image or thumbnail, so make it pop. It needs to be interesting enough to make someone stop and press play.
Build Community with Idea Pins
Idea Pins (which you might remember as Story Pins) are basically multi-page slideshows of images or videos.
They’re perfect for telling a story or walking your audience through a process. Think of them as a mini-blog post or tutorial that lives right on Pinterest.
They’re a fantastic way to show a transformation, a step-by-step process, or a little behind-the-scenes glimpse of your brand.
A food blogger could use an Idea Pin to show each step of a recipe, while a personal trainer could string together video clips of a quick workout routine.
The one catch is that users can’t click away from Idea Pins to an external website. Their main job isn’t to drive traffic directly but to build your on-platform following and engagement.
When your Idea Pins do well, it gives all your other Pins a nice visibility boost, too.
Make Sure Your Next Pin is Ready To Rank
Uploading Pins to Pinterest shouldn’t feel like trial and error.
Once you’ve designed your image and written your title and description, the real win is knowing everything is optimized before you hit publish.
Instead of guessing, run each new Pin through our free Pin Optimization Checklist.
In just a few minutes you can double-check your image size, text overlay, keywords, alt text, links, boards, and hashtags so every upload is set up for maximum reach, saves, and clicks.
Answering Your Top Pinterest Upload Questions
Even with a solid workflow, you’re bound to run into a few specific questions.
Let’s tackle some of the most common ones I hear from people trying to master their Pinterest strategy.
How Many Pins Should I Really Be Uploading Each Day?
Forget the old-school advice you might have seen about pinning 20-30 times a day. The Pinterest of today is all about quality and consistency, not just blasting out content.
The algorithm favors new and relevant material. Your goal should be to publish 1-5 high-quality, “Fresh” Pins every single day.
So, what’s a Fresh Pin? It’s simply a new image or video that Pinterest hasn’t indexed before. It can link to an old blog post, but the visual itself must be new.
This approach is way more effective for real growth than spamming your followers with the same old stuff.
Is It Okay to Re-upload the Same Pin to Different Boards?
Yes, but you have to be smart about it. Saving a super-relevant Pin to a few different boards makes perfect sense, especially if you space it out over several days or weeks. This is a classic “interval pinning” strategy that helps you reach different pockets of your audience.
What you don’t want to do is dump the exact same image onto a dozen boards all at once. That’s a surefire way to get your account flagged for spammy behavior.
A much better strategy? Create a few unique Pin designs for the same blog post or product. Then, you can sprinkle these different Fresh Pins across all your relevant boards over time.
This maximizes your reach without ever looking like spam.
Help! Why Are My New Pins Getting Zero Views?
It’s easy to feel discouraged when a new Pin gets little to no traction, but don’t panic. This is often just part of the process. Before you start to worry, run through this quick checklist.
- Did You Nail Your SEO? Check your Pin title, description, and board details. Are you using keywords people are actually searching for? Strong SEO is the foundation for getting discovered.
- How’s Your Design? Is your Pin eye-catching? Is the text easy to read on a phone? Stick to the ideal 1000×1500 pixel size. A clunky design will get scrolled past in a heartbeat.
- Have You Given It Time? This is a big one. Pinterest is a search engine, not a social media feed. It can take days, sometimes even weeks, for a new Pin to get properly indexed and start showing up in search results.
If you’ve covered these bases, just keep going. Consistency is your best friend on Pinterest. Focus on creating genuinely helpful Pins, and the views will come.